
If, after the ductwork is installed and the system is turned on, the airflow is insufficient, the noise is excessive, and the energy consumption is high—this is very likely due to air leakage. Air leakage not only wastes energy but may also cause the system to fail acceptance testing.
The causes of air leakage can be categorized into two types: those from the processing stage and those from the installation stage. Below, we’ll break down each one to help you quickly locate and resolve the problem.
I. Processing Stage: “Inherent Defects” Present at the Factory
Cause 1: Loose Seam, Excessive Gap
Symptoms: Visible gaps in the seam, air leakage can be felt by hand.
Root Causes:
• Excessive gap between the seaming machine rollers, insufficient seam depth
• Worn rollers, irregular seam shape
• Insufficient clamping during seaming, causing sheet metal to rebound
Solutions:
• Regularly inspect the seaming machine rollers and replace worn ones promptly
• Precisely adjust the roller gap according to the sheet metal thickness
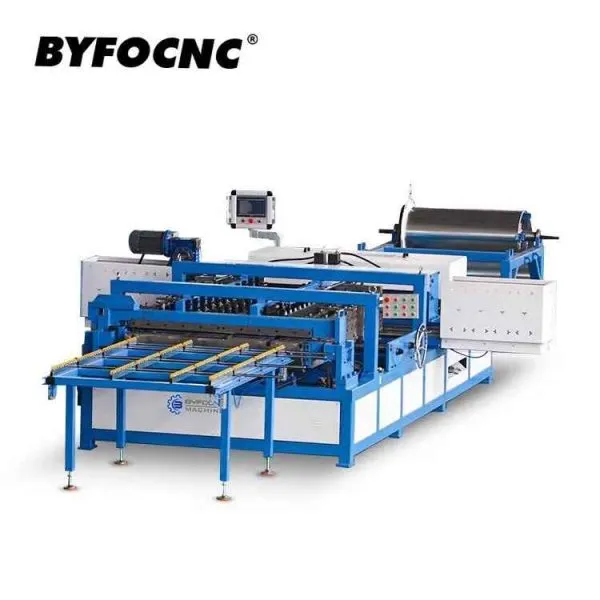
• BYFO seaming machines use precision rollers, ensuring a high degree of seam tightness.
Cause 2: Non-standard Flange Dimensions
Symptoms: Flange angle brackets cannot be installed, or the flange surface is uneven, and the sealing strip is not tightened.
Root Causes:
• Inconsistent flange edge forming on the common plate flange machine
• Flange angle code hole position deviation
Solutions:
• Inspect flange dimensions on the first piece after each specification change
• Regularly calibrate the common plate flange machine mold
• Use a higher precision BYFO common plate flange machine
Cause 3: Burrs on the Cut End Face
Symptoms: Burrs on the pipe edge pierce the sealing tape.
Root Causes:
• Dull cutting blade, rough cut
• Burrs produced by saw blade cutting (chip cutting)
Solutions:
• Regularly replace the cutting blade
• Use flying cutting (chipless cutting), resulting in a smooth, burr-free cut
Cause 4: Excessive Diagonal Error
Symptoms: Rectangular duct ports are not square, causing misalignment during flange connection.
Root Causes:
• Inaccurate length positioning on the duct production line
• Deviation during forming
Solutions:
• Regularly calibrate the equipment’s length positioning system
• Check if the feeding guide device is aligned
• Diagonal accuracy of the BYFO production line ≤ ±0.8mm
II. Installation Stage: Air Leakage Caused by On-site Operation
Cause 5: Incorrect Sealing Strip Selection or Inadequate Compaction
Symptoms: Continuous air leakage at the flange connection.
Root Causes:
• Incorrect sealing strip material (not heat-resistant, not aging-resistant)
• Insufficient strip thickness, flange not tightened
• Twisted or misaligned sealing strip during installation
Solutions:
• Use EPDM (Ethylene Propylene Diene Monomer) sealing strips for ventilation systems
• Use silicone rubber heat-resistant sealing strips (temperature resistance > 200℃) for smoke exhaust systems
• Tighten bolts with a dedicated tightening tool during installation
Cause 6: Bolts Not Tightened in Sequence
Symptoms: Obvious air leakage at one corner of the flange.
Root Causes: Installers, seeking convenience, tighten bolts haphazardly, resulting in uneven stress on the flange surface and inadequate localized tightening of the sealing strip.
Solutions: Tighten the bolts in a diagonal, alternating sequence (tighten the four corners first, then the middle), gradually increasing the force in 2-3 stages, do not tighten them all at once.
Cause 7: Excessive Hanger Spacing, Causing Duct Deformation
Symptoms: The middle of the duct sags, and the flange joints are twisted and deformed.
Root causes: The hanger spacing exceeds the specification requirements, causing deformation due to the duct’s own weight, and damaging the seal at the joints.
Solutions: For circular ducts: the hanger spacing should not exceed 3m (or 2.5m if the diameter is >1m); for rectangular ducts: the hanger spacing should not exceed 2.5m. Hangers should be added within 1m on each side of the duct connection.
Cause 8: Improper Socket Connection
Symptoms: Air leakage at the socket of the circular spiral duct.
Root Causes:
• Insufficient insertion depth
• Uneven application of sealing tape
• Out-of-round pipe end causing excessive clearance
Solutions:
• Ensure insertion depth is ≥ 1/3 of the pipe diameter and not less than 50mm
• Apply 2-3 layers of sealing tape evenly
• Check pipe end roundness before insertion
III. Quick Troubleshooting Checklist
| Air leakage location | The most likely reason | Priority check |
| Bite seam | Loose bite and worn rollers | Adjusting the gap of the lock forming machine |
| Flange connection | Sealing strip and bolt tightening sequence | Check that the rubber strips are in place and that the bolts are tightened in a diagonal sequence |
| Pipe body (excluding connection points) | Late deformation, impact and perforation | Visually inspect the tube for any obvious damage |
| Socket | Insufficient insertion depth, tape issue | Pull it out to check the insertion depth and the tape |
| Duct middle section (especially large diameter ducts) | Too large spacing between hangers | Check the spacing between the hangers and add more hangers |
IV. How to Systematically Prevent Air Leakage?
Establish a complete quality control process from processing to installation:
Processing End (Advantages of BYFO Equipment)
• High-precision forming equipment → Good flange dimensional consistency, tight sealing strip
• Flying cutting → Smooth pipe ends without burrs, no puncture of sealing tape
• Precision lock forming machine rollers → Tight bite, minimal gaps
Installation End (On-site Operation Standards)
• Select the correct material for the flange sealing strip (EPDM/silicone rubber)
• Tighten bolts diagonally in a crisscross sequence
• Control hanger spacing within 2.5-3m
• Check pipe end roundness before installation
Before Shipment
• 100% visual inspection of finished ducts
• Randomly test for light leakage (internal lighting, external observation of light leakage points)
After Installation
• Conduct air leakage test according to specifications (mandatory for medium and high pressure systems)
• Repair leaks promptly
V. Summary
Air leakage is not a “common problem,” but a preventable quality issue. As long as the processing equipment is precise and the installation operation standards are followed, the air leakage rate is completely controllable.
BYFO’s advice: Preventing duct leakage requires a four-step approach: solid foundation at the manufacturing stage + adherence to specifications at the installation stage + quality control before shipment + rigorous acceptance after installation. Most leakage problems can be detected during the pre-shipment light leakage test.
If you have any leakage issues, please contact BYFO technical team. We can help you diagnose the cause remotely.
Email: byfo@byfomachine.com
Whatsapp: (0086)18255536645